|
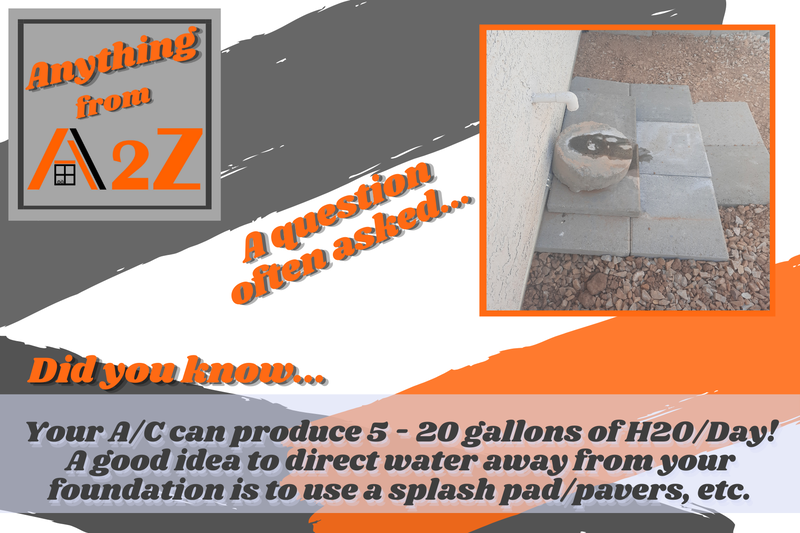
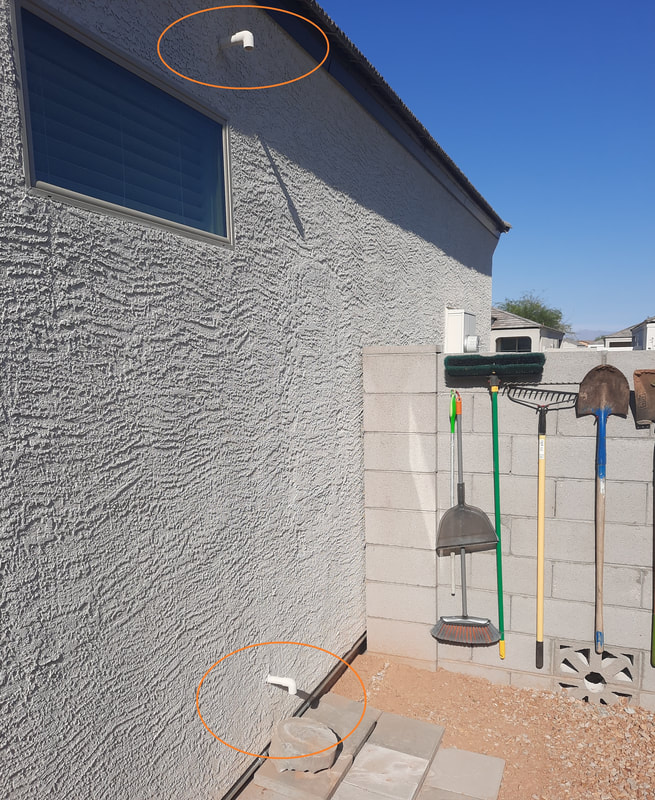
The pipe down low is the primary or main condensate line from your air conditioner. Seeing water dripping or trickling from this line is normal operation, and you can probably relax. It's a good idea to have some sort of method to divert or disperse the water so that it doesn't pool or collect next to your house causing other issues/damage. See photo above.
The emergency drain line is connected to a shallow pan installed below your air handler. This pan is known as the overflow drain pan, secondary pan, or emergency drain pan. This pan is designed to catch water when your primary drain line is clogged in the hopes to protect your attic, ceiling and personal belongings – but is only meant to provide temporary protection. If you see water coming out of a pipe on the side or rear of your home up high, it means your main condensate line is clogged and you need to call for AC service right away. It is purposely installed high up, so you notice the water dripping sooner than later.
0 Comments
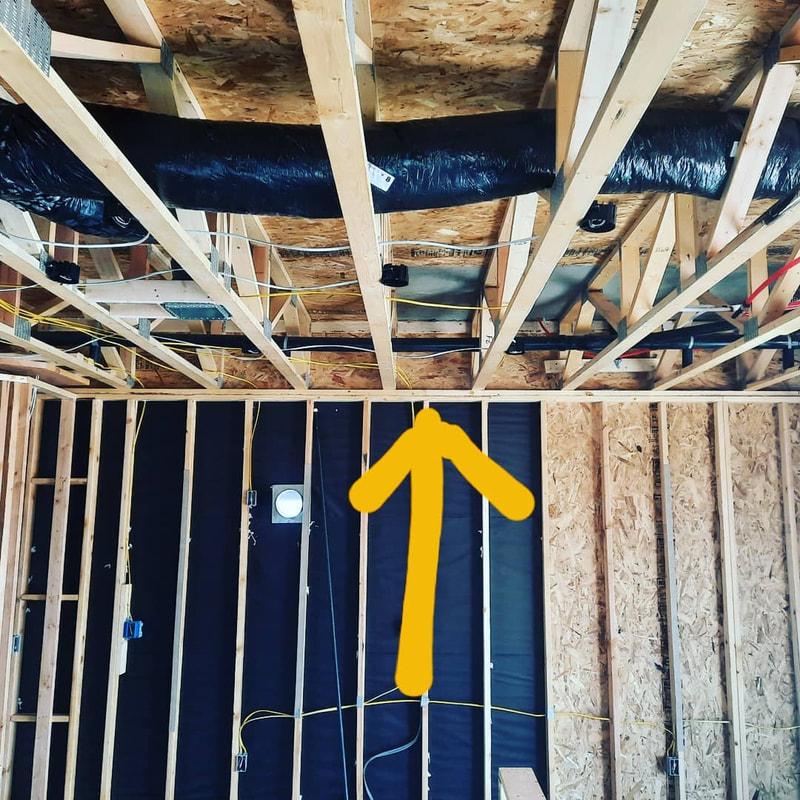
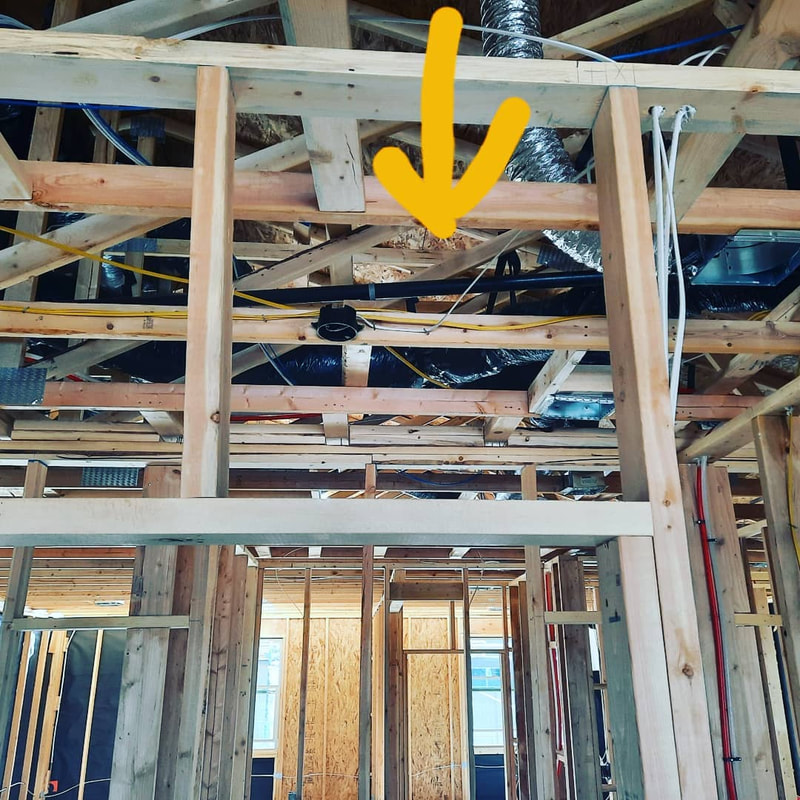
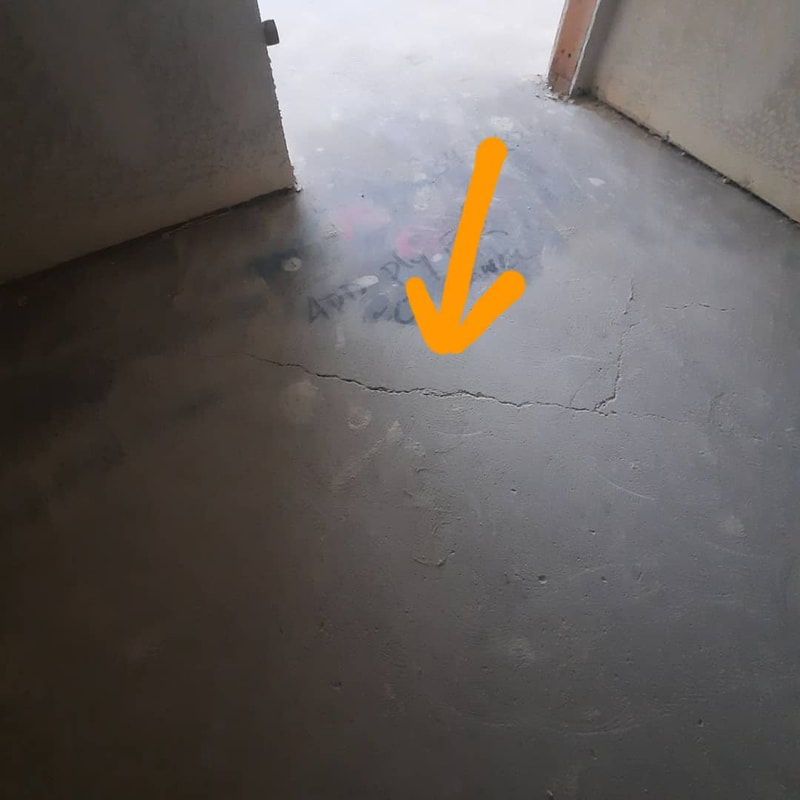
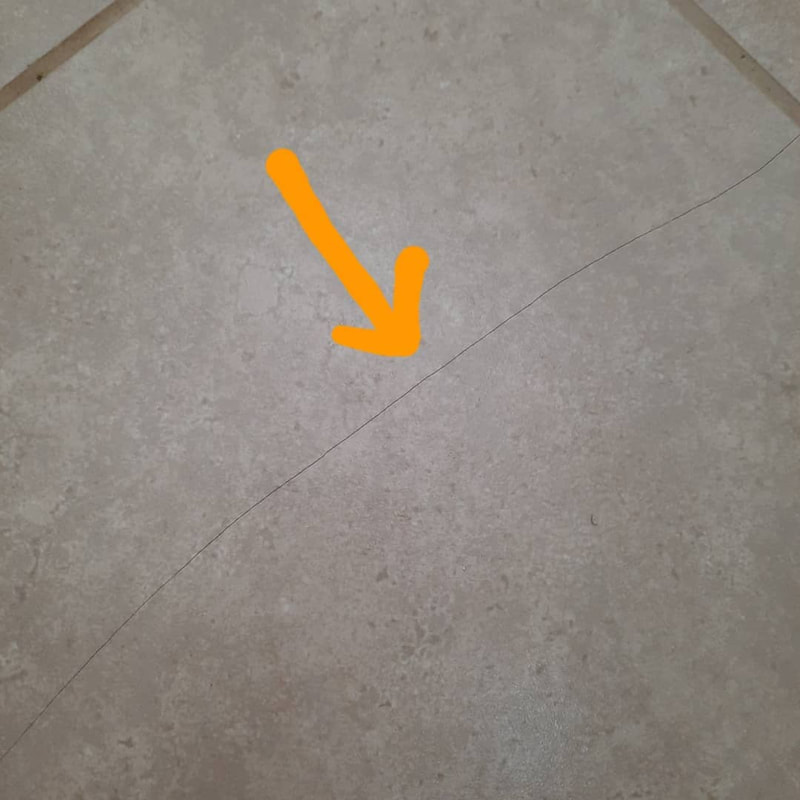
If you are building a new house, we can't stress enough! One of the most important inspections to get done is your pre-drywall inspection! This is the perfect time to inspect all of the structural and mechanical systems in your home before it all gets covered up. Your builder will address these issues now, which could save you lots of money and issues down the road. Here are four pictures of concern I noted at one house.
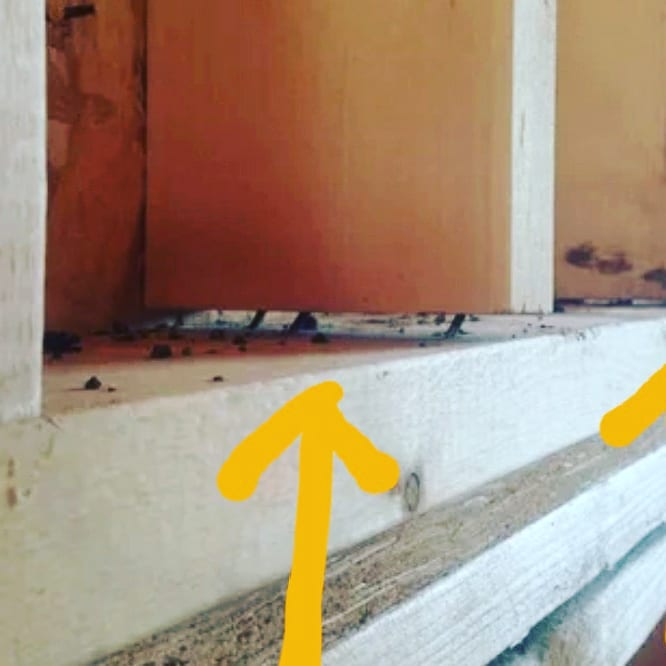
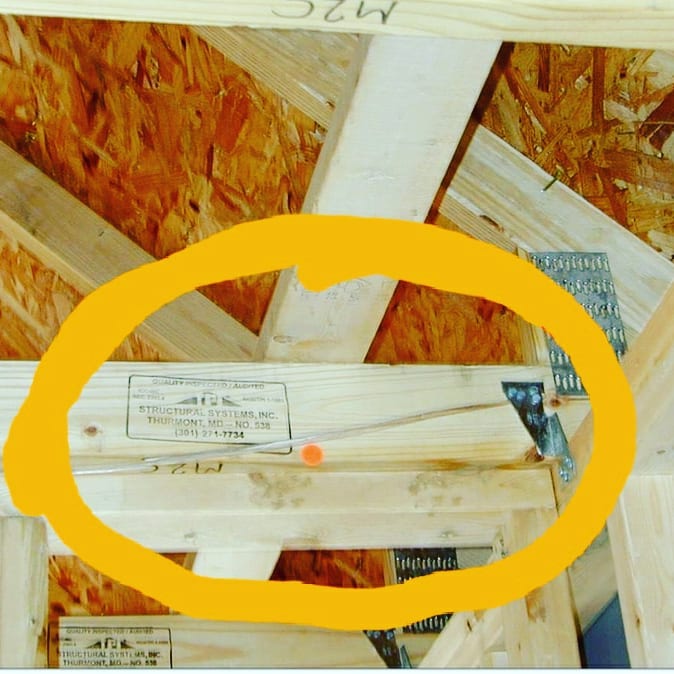
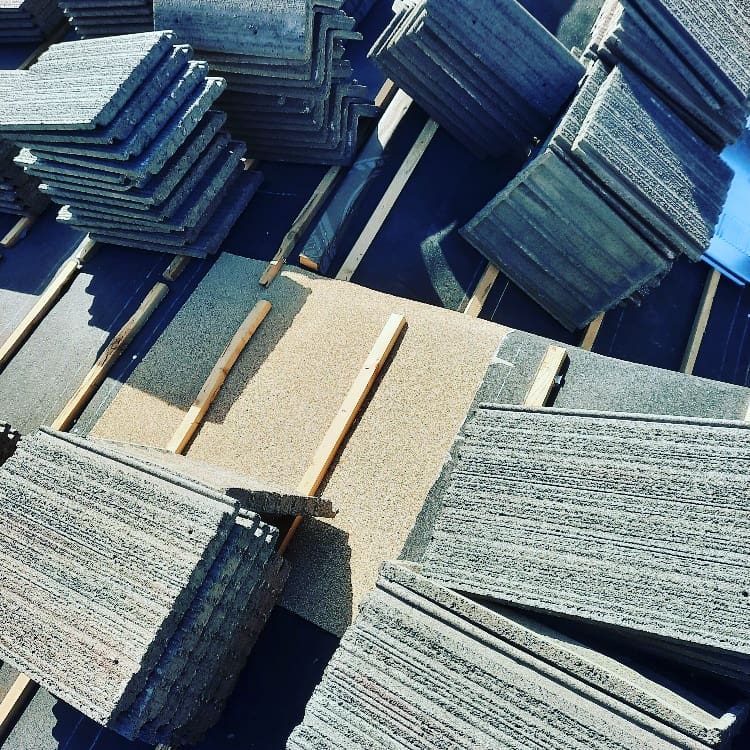
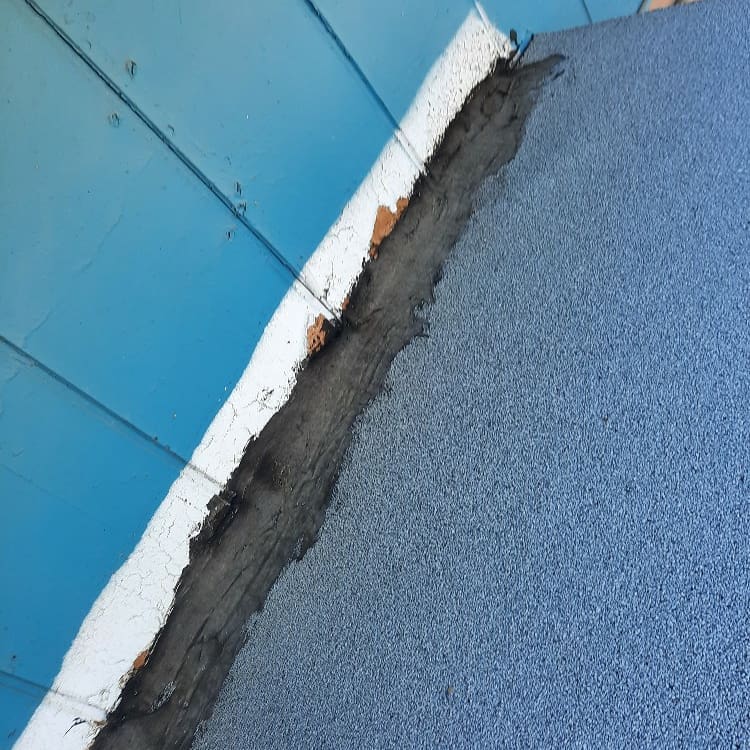
1. Cracking in concrete can/will crack your new floor tiles. 2. Gaps in studs on a bearing wall will settle and create jamming doors/windows and sheetrock damage. 3. A split truss member will cause the roof to sag and increase potential water damage. 4. Unmatched material used as underlayment on the roof may not have the same life span. A few hours and a couple hundred dollars can save you a lot of time and money down the road. No flashing vs flashing!
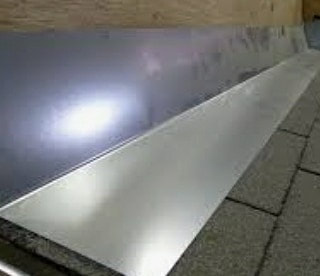
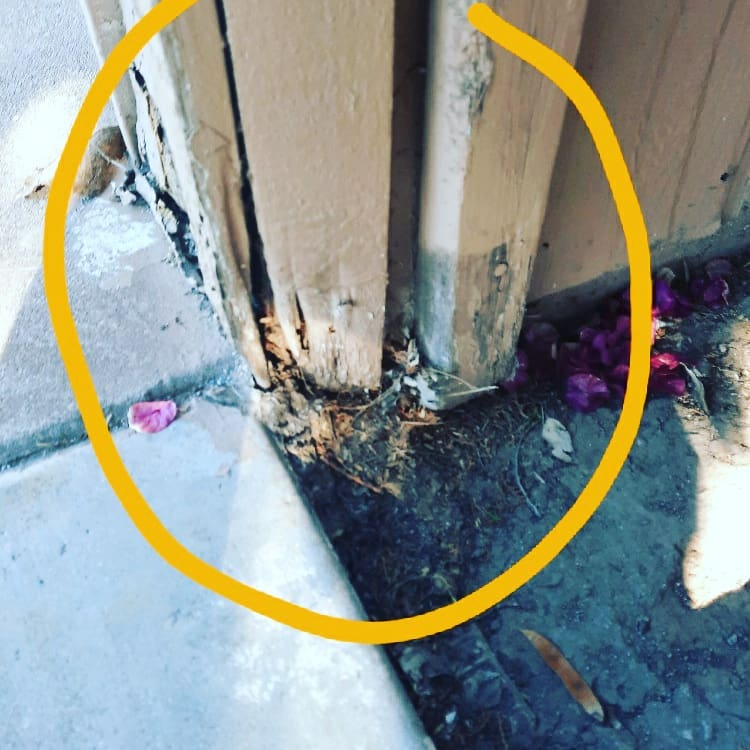
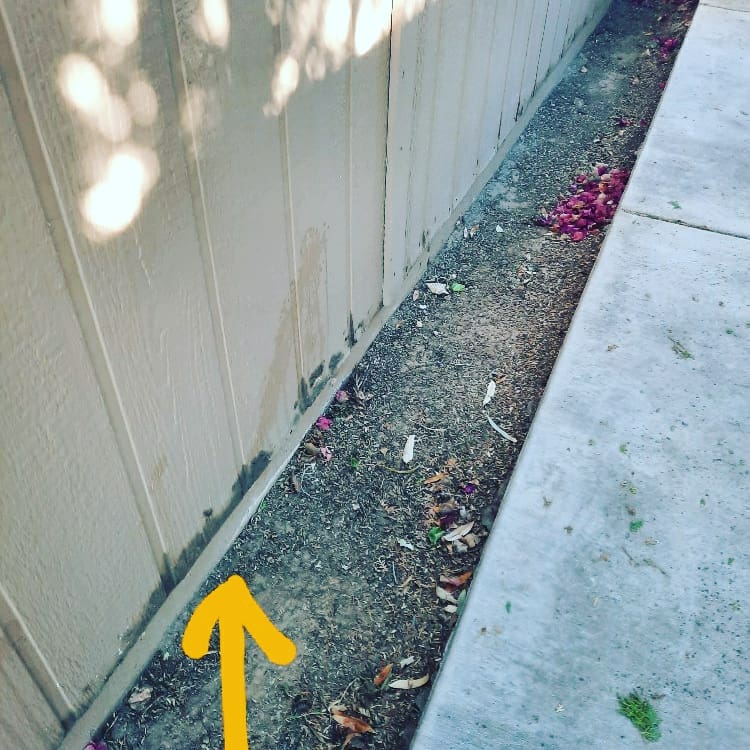
1st pic- how not to transition from wall to roof. 2nd pic- correct transition from wall to roof. Here is a great example of why it's important to have around 4" to 6" of clearance between your siding and hardscape/ground. The trapped moisture will deteriorate the paneling at a much faster rate.
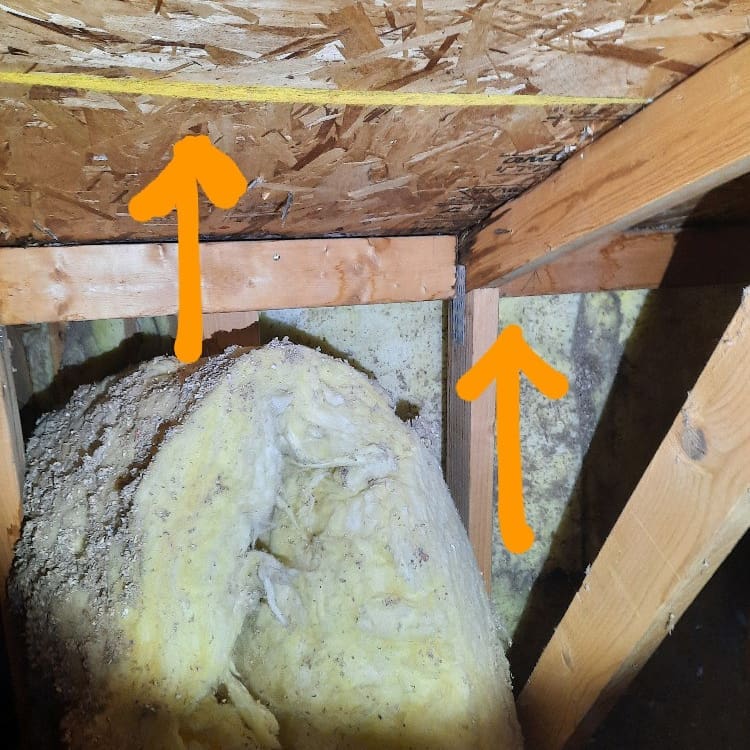
Here is a great reason to inspect an attic or check your own attic. The left arrow is sagging/separating roof decking. The right arrow is moisture staining on the roof decking and trusses. Remember the roof tiles can look to be in great shape, but the story usually lies with the underlayment.
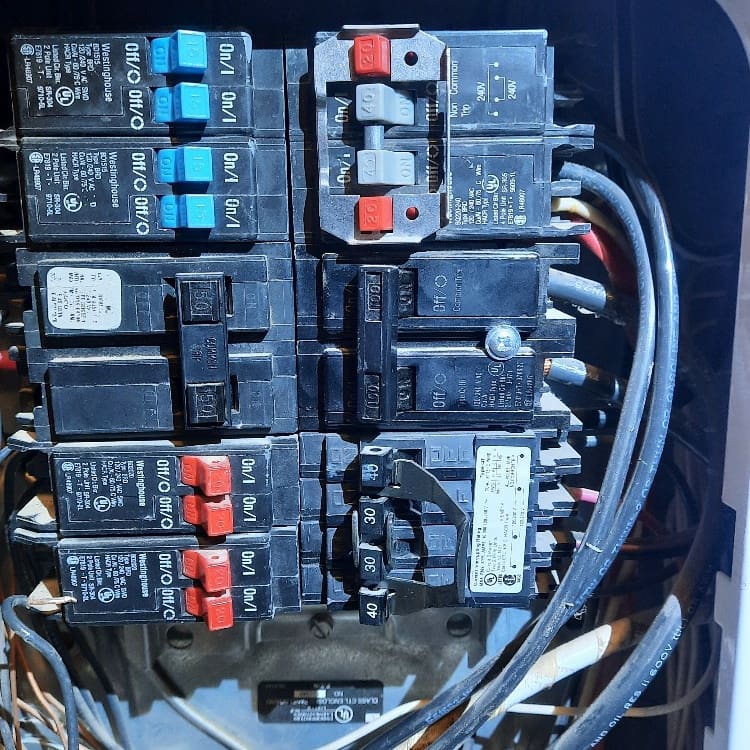
On my inspection the other day I had multiple issues before I came across this. The way this house was looking I wasn't shocked(no pun intended) to find these culprits in the electrical panel.
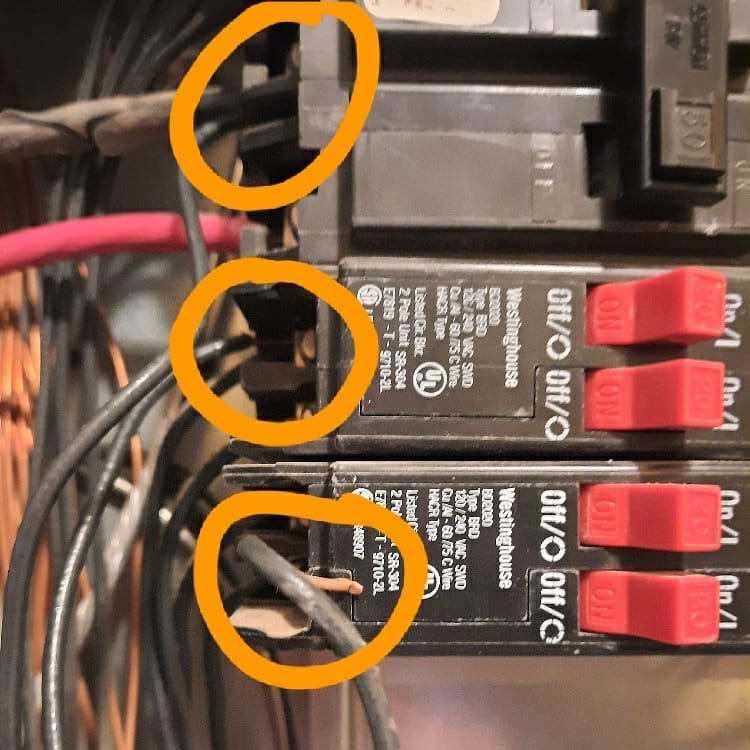
(1st pic)The immediate thing that jumped out, is the multiple brands of breakers being used. This is a concern because of compatibility reasons. Also tells me that someone is trying to be an electrician...not a good idea! (2nd pic)The top two circles are what we call "double taps". This is when multiple wires are connected to one terminal on a breaker. Not good! This is definitely a safety issue due to fire. The bottom circle is a floating wire not connected to anything...an accident waiting to happen! Getting a licensed electrician to come out and fix these issues along with other concerns I found on this property won't be cheap! Be smart...get an inspection and protect yourself and your investment. Hi everyone!
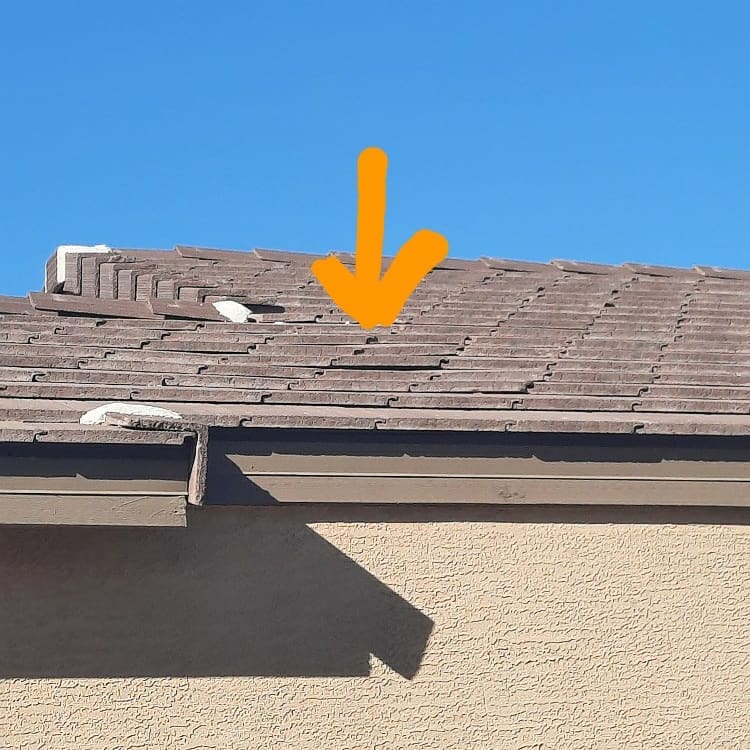
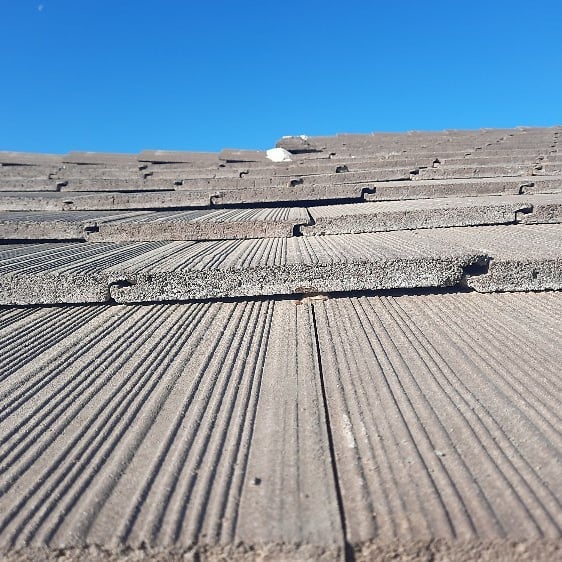
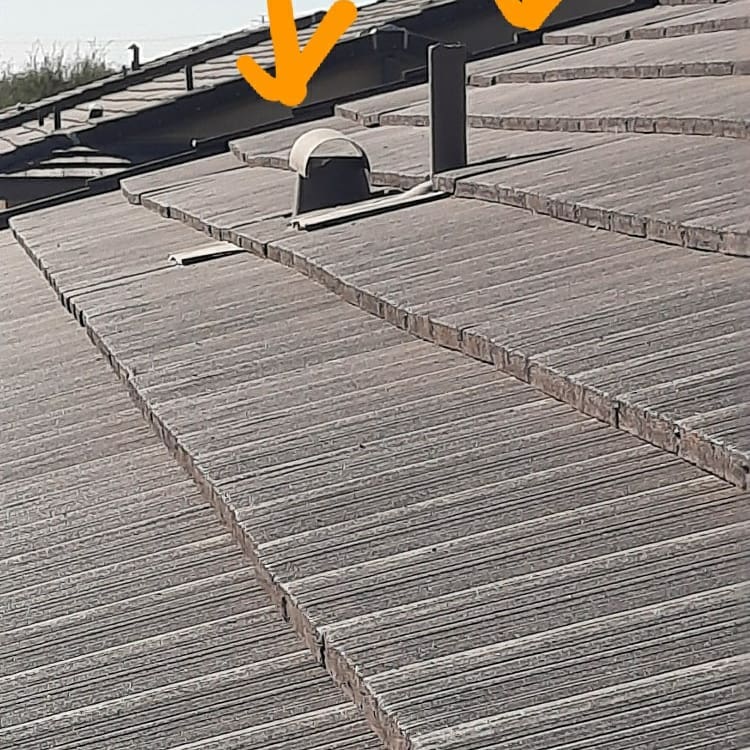
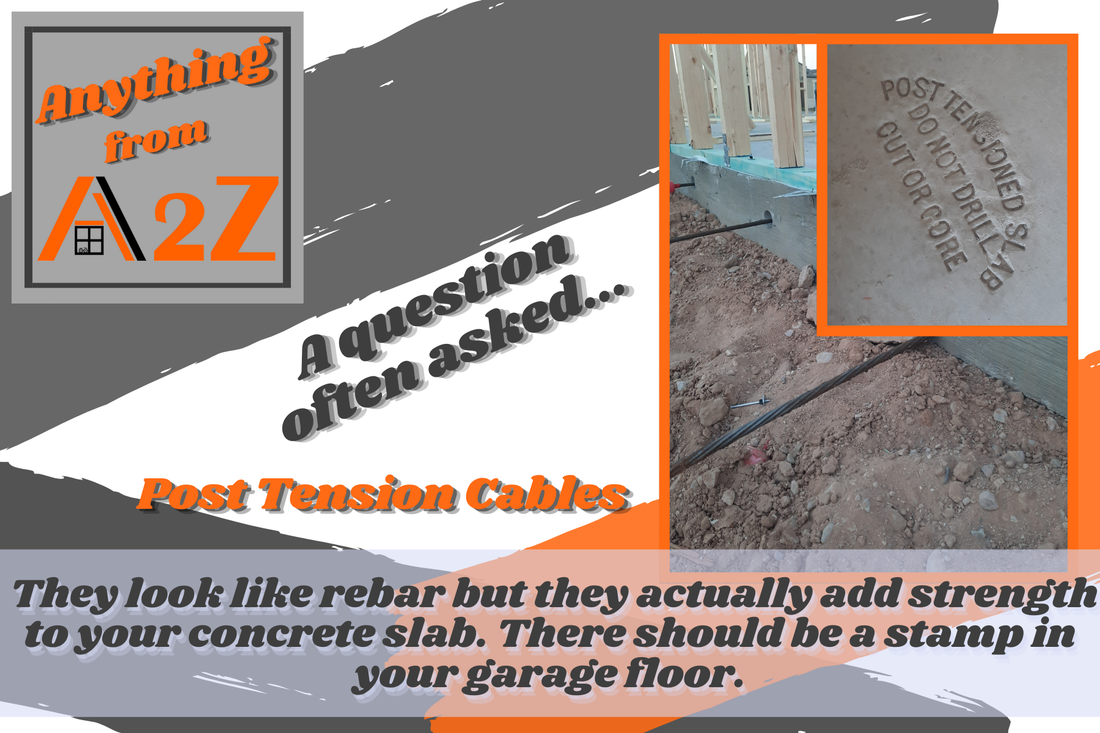
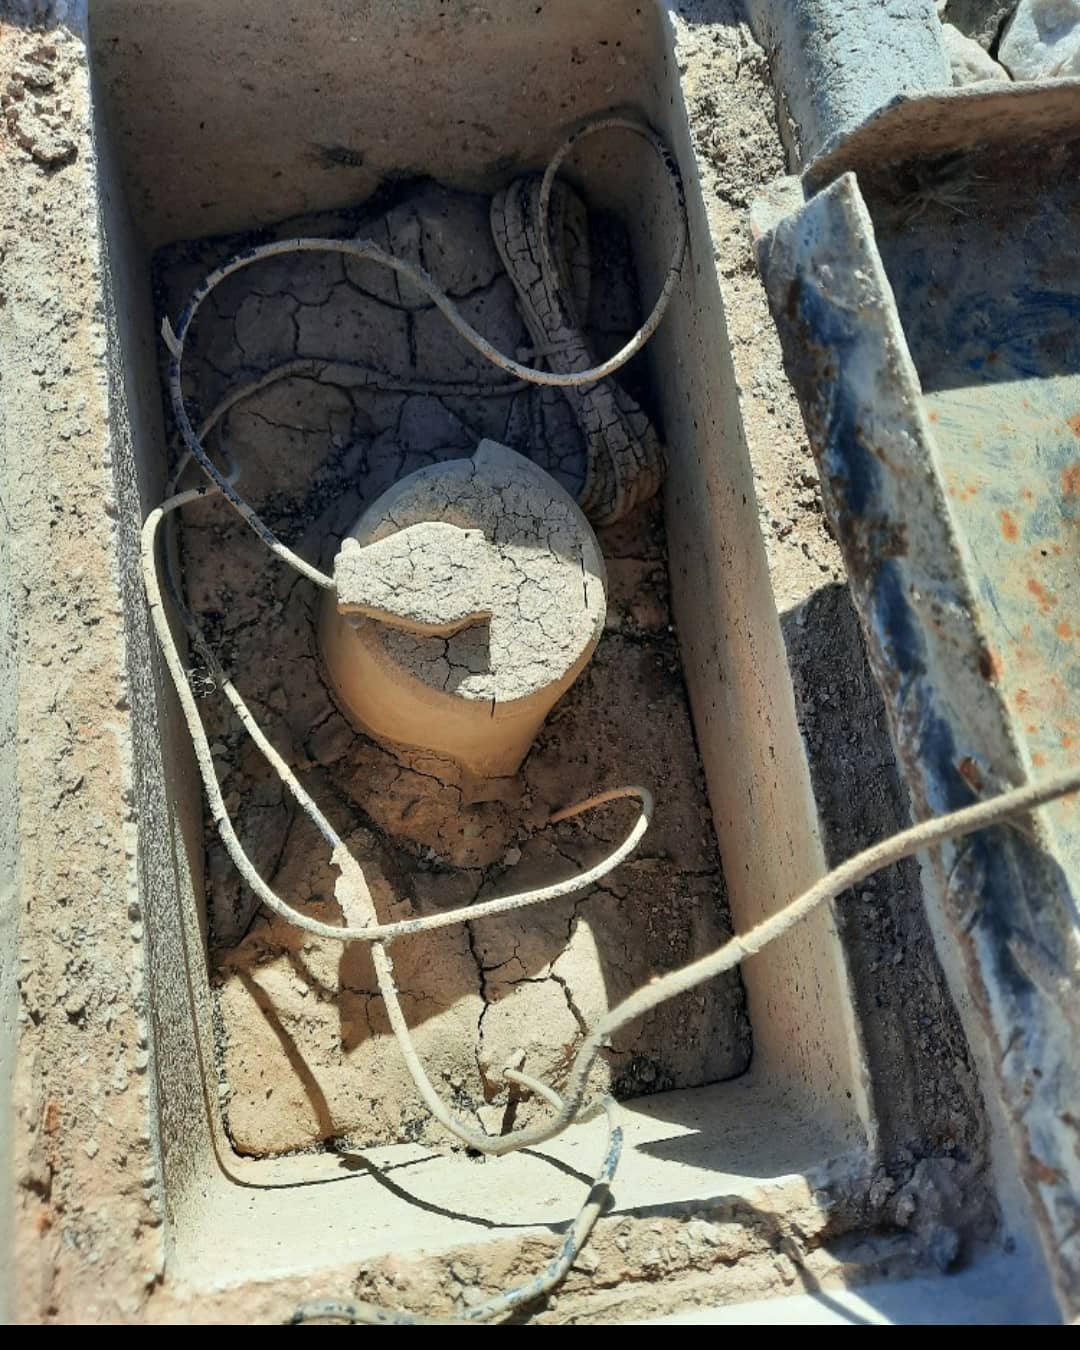
I want to address how different angles can show when something can look very minor, to something pretty significant. My first pic from the ground shows what looks like maybe some lifting tiles. Not really a big deal. My second pic from up close shows that their could be some potential sagging? So I decided to move my ladder to get a better side angle. Note this is an 11 month warranty so I can't walk on the roof due to voiding the warranty. My third pic really tells the story! There definitely is sagging in this roof. It looks to be about the length of a full sheet of roof decking. Remind you...this is only 10 months old! Luckily the owner decided to get an inspection because of cracking floor tiles and we caught this too. Now it's in writing and documented before his 1yr warranty expires. This roof issue would be thousands of dollars to fix down the road. If Something doesn't seem or look right go with your gut and get an inspection! 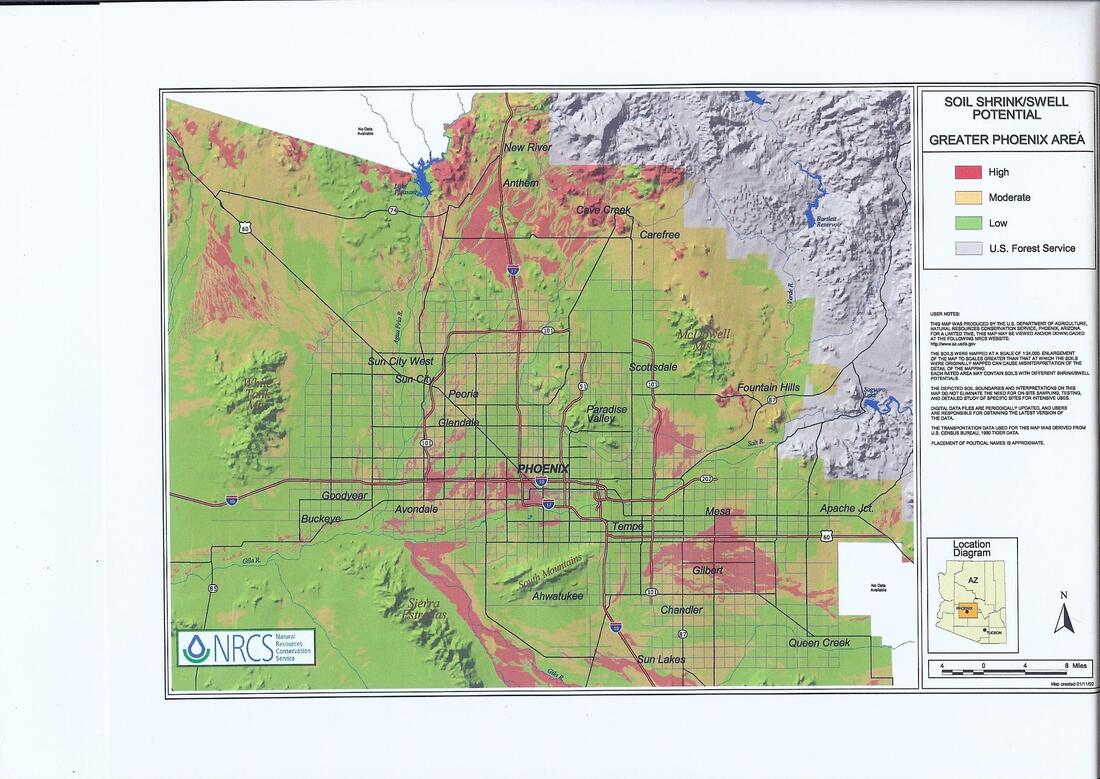 What are post tension cables? Post–tension cables are used in concrete construction to allow thinner slabs and greater span lengths between support columns. These cables, composed of steel wires inserted into a plastic sheath, are subsequently "tensioned" and grouted after the concrete is poured. POST TENSION SLABS - You may not know it but if you own a modern home you probably have a post-tension slab. A post-tension slab is a slab of concrete without traditional stem type footings instead there is a series of cables or tendons that run the length of the slab. The concrete is allowed to cure to about 75% of the way, at which point post-tensioning occurs. Each of the tendons in the post-tension slab is pulled tight, using a hydraulic jack. The tensing of the cables occurs after the concrete has mostly cured, hence the term “post-tension.” The tendons are usually pulled to a tension of 25,000 pounds per square inch. Once the cables have reached the designated tension, they are anchored in the concrete, and the slab is allowed to fully cure. Many modern homes are built on a post-tension slab, which serves as an excellent foundation. This method of pre-stressing concrete is especially useful in areas where the soil expands and contracts relative to weather conditions. Overall, a post-tension slab is stronger with less concrete and is less likely to shift and cause flooring problems in your home. STEM FOOTING SLABS - A traditional home slab uses the stem footing method. This method consists of a footing trench around the perimeter of the slab and rebar that is used to prevent movement during soil shifts. There is also a stem or vertical wall around the perimeter poured into the footing trench to act as a support for the supporting the perimeter walls and roof. This method of slab while tried and true uses more concrete to maintain the needed strength and is more susceptible to shifts in your flooring where cracks appear. Post tension slabs are used in many parts of the country where the soil has high shrink / swell potential, also commonly know as expansive soil because they resist soil movement. Many parts of the Phoenix area have soil that is expansive and exhibits a high shrink / swell potential. The USDA has published a shrink / swell potential map for Phoenix which identifies the cities or towns most affected by this condition. The soil in Arizona, in some parts of the state, has "clay like" tendencies. Specific areas of the state are prone to "clay like" tendencies, sometimes referred to as "EXPANSIVE SOIL". It is not unusual for a home/building in Arizona to exhibit signs of settling by evidence of cracks in walls, doorways, garage floors, patio decks, drive ways, roof tie-ins and a number of additional locations in, on and around the home/building. The Registrar Of Contractors, sites any gap/crack in foundations or walls etc. That exceeds 3/16th of an inch in width is considered unacceptable and requires the attention of professionals to examine the cause of such cracks. What happens when a post tension cable breaks? Post-tension reinforcement are stranded cables that are contained typically in a plastic sheaths...Therefore, when a post-tension cable fails it is an aggressive catastrophic failure typically shooting out the end of the building and blowing out the concrete on either the top or the bottom of the deck. Is post tension better than rebar? Strength. Post-tensioned concrete is stronger and more flexible than conventional steel-reinforced concrete. According to the Concrete Network, post-tensioning helps reduce cracking from shrinkage as the concrete dries, and holds together any cracks that do form. Check out this informative article to learn more! https://www.concretenetwork.com/post-tension/basics.html I've been coming across this a lot lately on new builds. This is your water meter. In cold areas they are in your house because of freezing temperatures. In Arizona they are in a box located in your front yard. As you can see it is pretty well buried under the dirt, which makes it hard to access. Why is this bad you might ask? Well...your house had 2 main water shut off valves. One is located on the exterior of your house usually along a garage wall. If that one fails, guess where your second shut off is? You guessed it! Buried under the dirt upstream of your water meter. Not very accessible in an emergency. Hopefully you'll never have an issue, but it never hurts to be prepared.
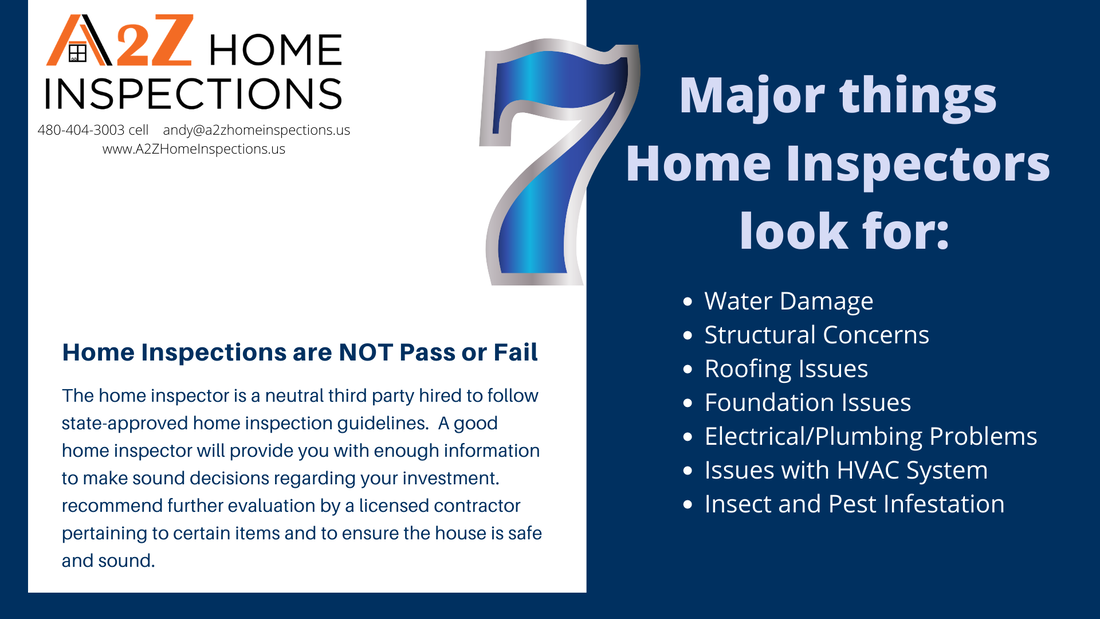
The home inspector is a neutral third party hired to follow state-approved home inspection guidelines. A good home inspector will provide you with enough information to make sound decisions regarding your investment, recommend further evaluation by a licensed contractor pertaining to certain items and to ensure the house is safe and sound.
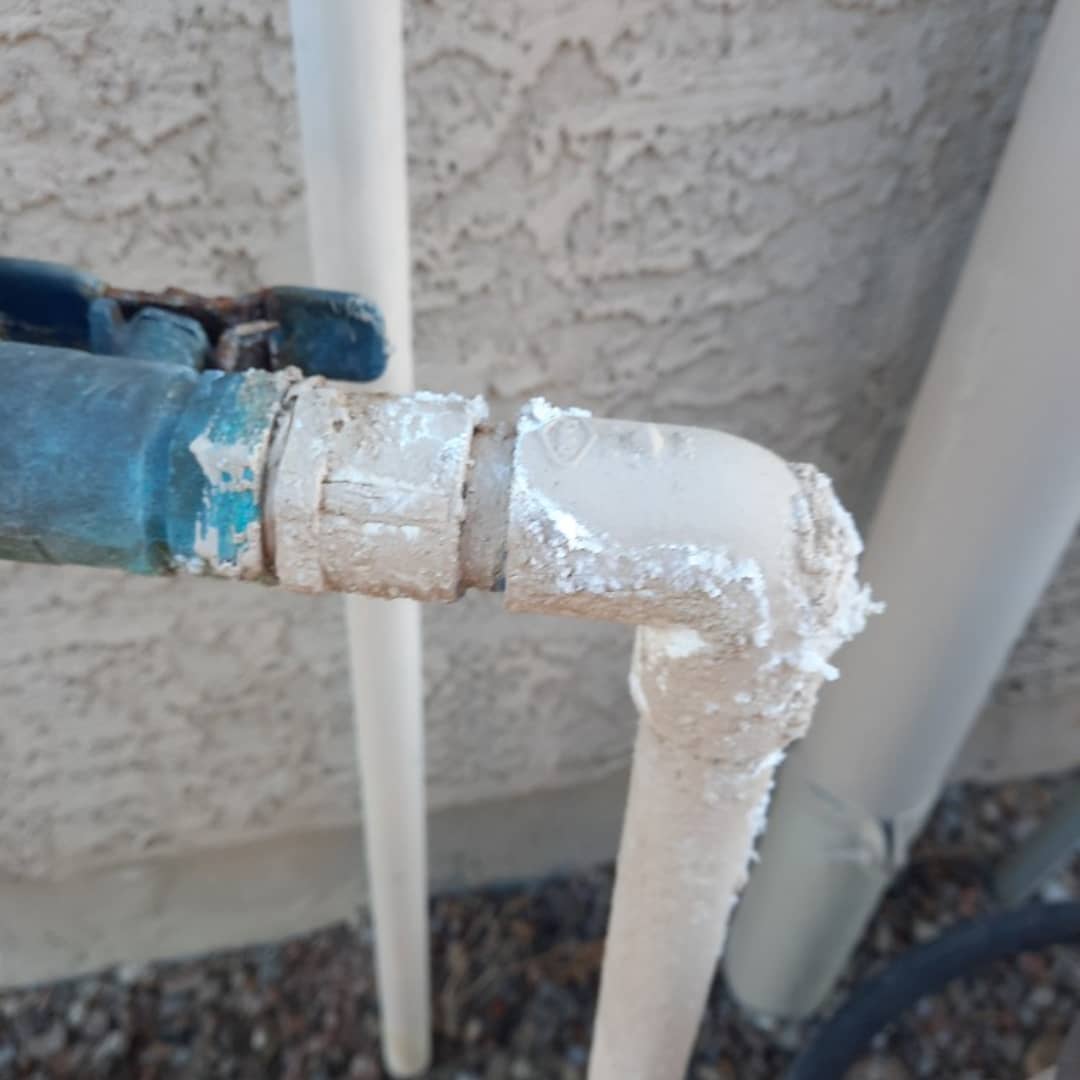
So what does a home inspector look for to determine this? Read on to find out... Another common find on my inspection today. This is an irrigation supply line. It is the transition from a brass irrigation shut off valve to the pvc underground line. The white debris on the pvc is a calcium/mineral build up. Whether it is actively leaking or not, this is something that needs to be fixed. Here's why.
1. You pay for your water usage. These types of leaks can add up and cost you a substantial amount cash. 2. We live in the desert. All types of critters such as scorpions and termites are attracted to moisture. 3. Your concrete foundation can be affected by the constant moisture penetrating your home. Typical things like this that get overlooked can bite you in the butt later. (no pun intended) You may be thinking that a New Home doesn't need an Inspection...WRONG!! New Home Construction is Fast & Furious and let's face it we are human and things can be missed!
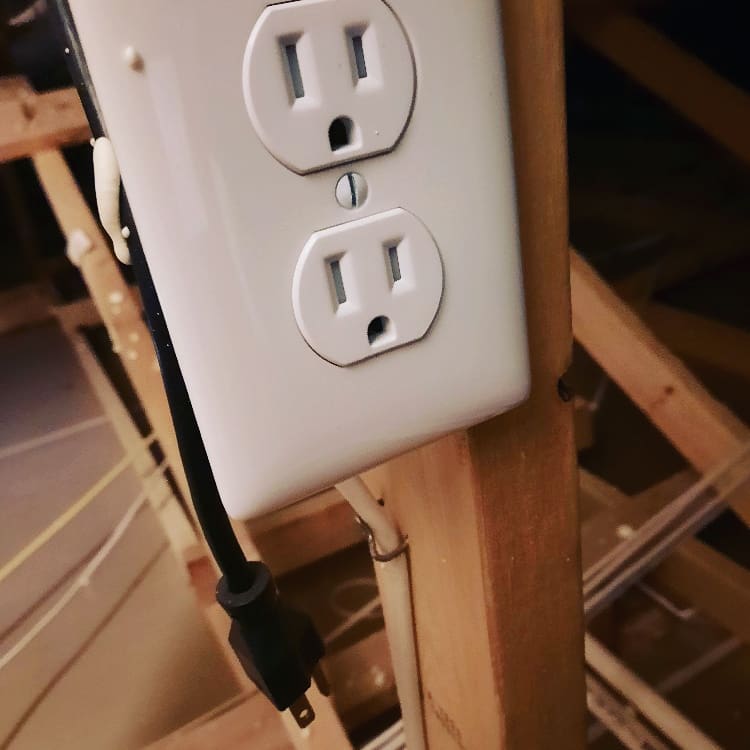
Protect your Investment with a Home Inspection!! A2Z Home Inspections specializes in New Build Pre-Drywall & Pre-Closing Inspections! This was a silly attic find yesterday! If you are lucky enough to have an Aprilaire system in your house, it works better if it's plugged in. When was the last time you went up in your attic?
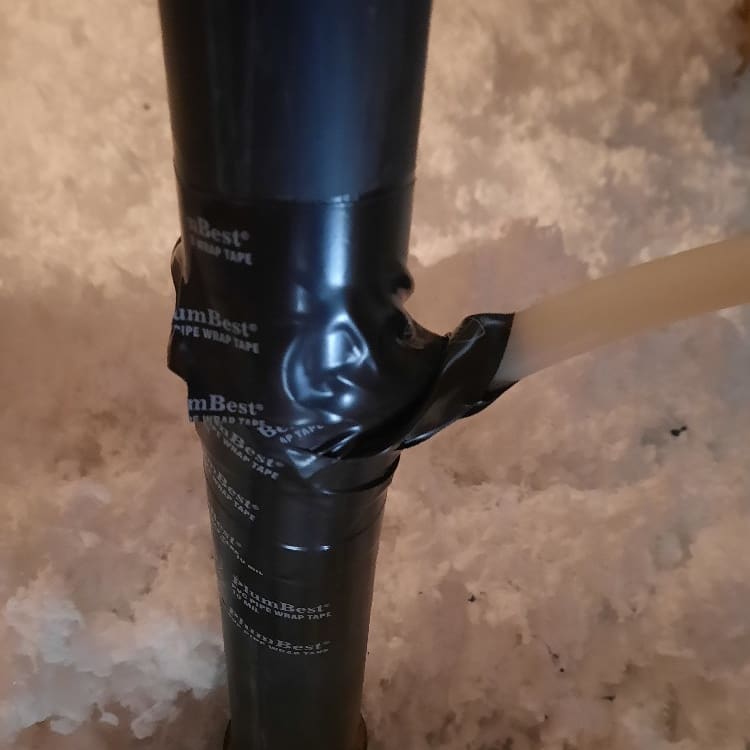
On one of my 11 month warranty inspections I found this. What you are seeing is a water softener drain line tapped into a plumbing vent in the attic space. Why this is a no no.
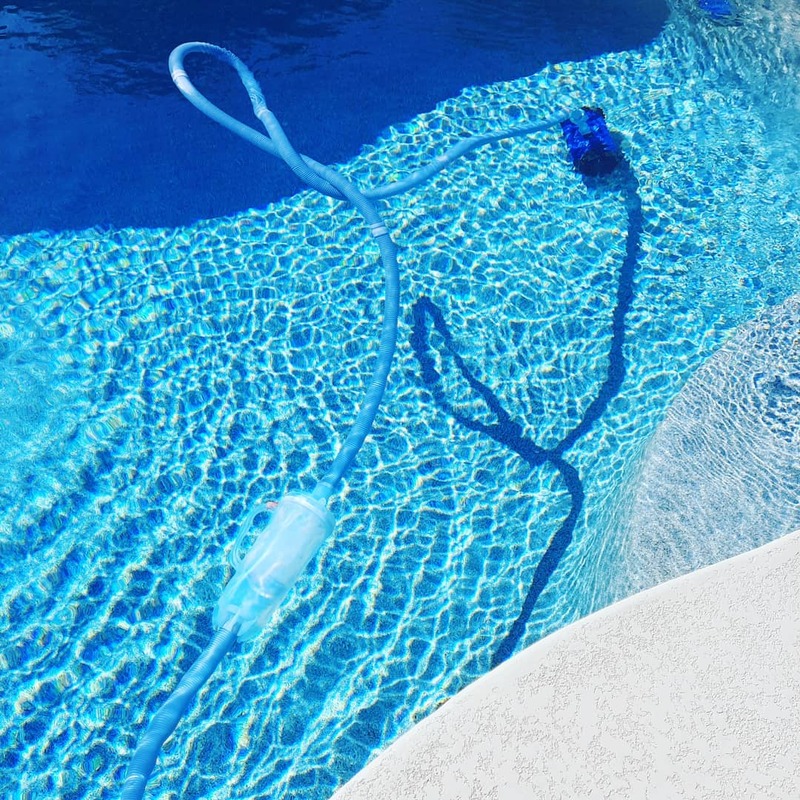
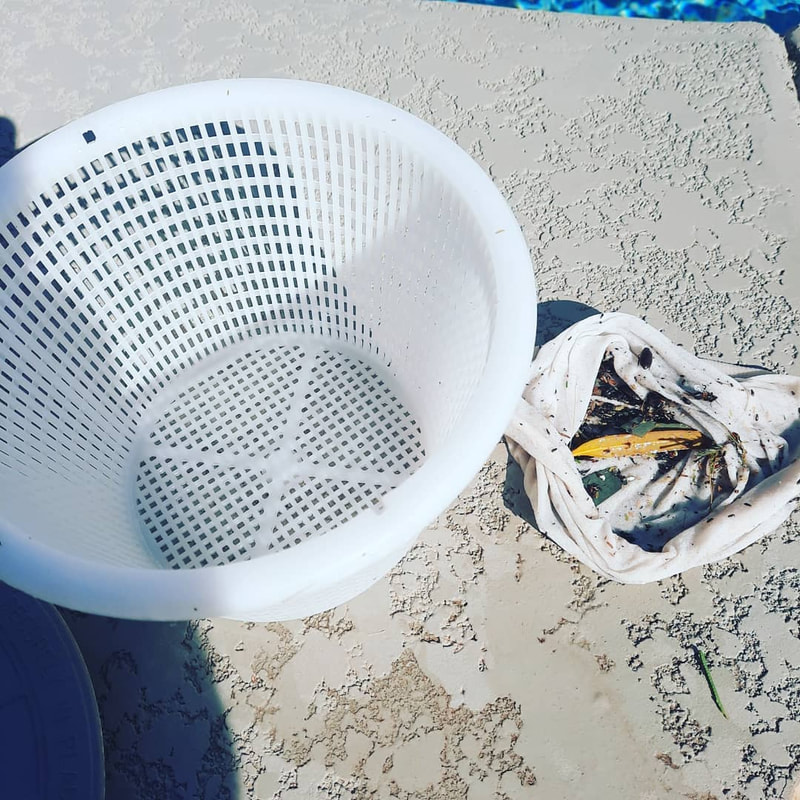
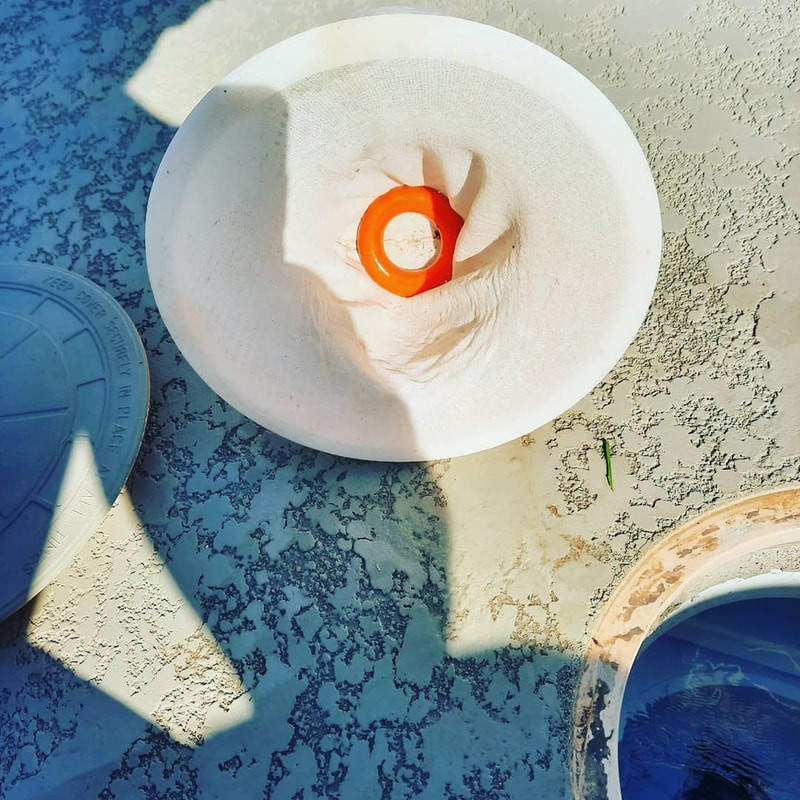
1. The potential for gas fumes to travel from the plumbing system to the water softener and contaminate your potable water. Ick! The drain should have an air gap to prevent this. 2. Obviously tape isn't the proper connection technique. This was located above the kitchen area. If this were to leak or separate it would flood their kitchen and cause all kinds of damage! From one pool owner to another I highly recommend these tips to keep your pool clean and running smooth!
1. Add a pool sock to your skimmer basket. The basket is great for catching bigger debris like leaves and such, but it let's lots of sand and small debris by. Because it catches more debris you will have to clean it more often. They are about $10 for a pack of 30 that are reusableable. I also add the weight(red golf club weight) in the sock to prevent it from floating. Well worth it! 2. Add a canister filter to your vacuum suction line. I recommend one with a net vs one with a basket for the same reason noted above. This also will filter what your vacuum is sucking up sending to your main pump filters. This filter you can pick up for $40. So these 2 items cost you a whopping $50 to protect your very expensive pool pump equipment. Hope these tips can help save you some money down the road. Because I was a journeyman plumber (on new construction) for over 10 years, one of my favorite jobs is the Pre-drywall Inspection. I like to see all the different techniques and styles builders use and how they differ from one another. To keep it simple I'm just going to focus on some plumbing issues that should be addressed.
1. The 2nd picture shows an arrow pointing at a 3" abs drain pipe in the ceiling trusses. This is the main drain coming from the 2nd floor master bath. Do you notice how it looks bowed? It is, the picture doesn't do it justice. The sagging in the middle will cause solids to collect there and lead to potential block up. You will get to know a drain cleaning company well. 2. The 3rd pic isn't as crucial because it's a vent pipe(not a drain pipe) for a laundry room. You can see it has a lot of slope. This should only have a 1/4" per foot. When I instantly see these items it concerns me what else I will uncover. These are good things to be fixed or at least documented before it's too late and the sheetrock is up! This is why it is so important to get a pre-drywal (stage) and 11 month warranty inspection.
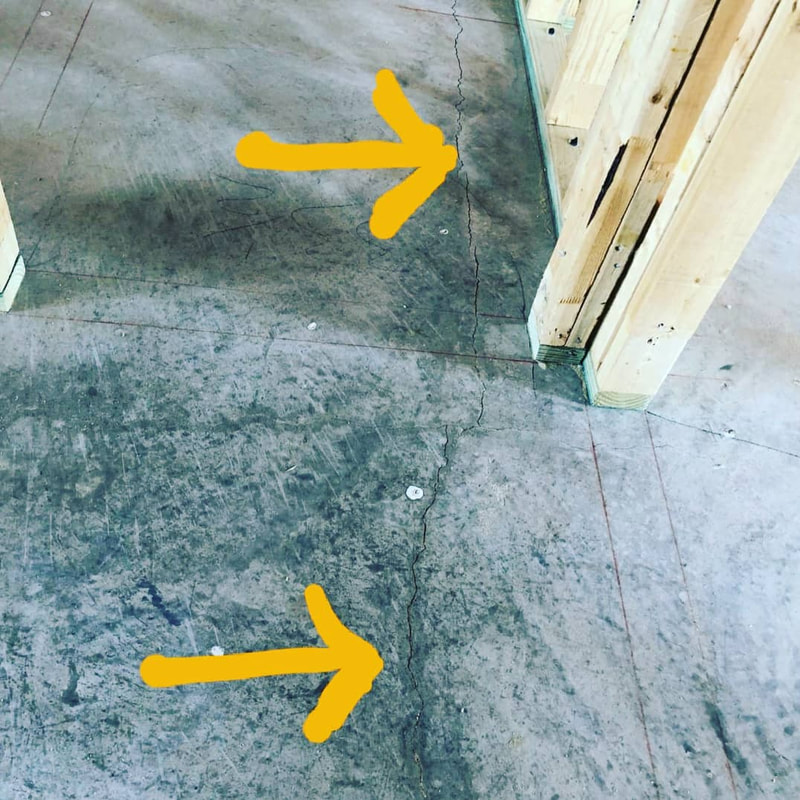
On a pre-drywall inspection I had as you can see from the 1st picture some cracking in the foundation(which continued throughout the laundry and adjoining bedroom). The 2nd picture shows how the cracking went throughout the house and was visible from the exterior. You can see what the outcome is by looking at the 3rd picture. In this home the crack continued through 4 tiles in the kitchen dining room area. The tiles were replaced by the builder and cracked once again. Most new construction homes are built on a post tension foundation which is super strong. So don't worry! Your house will not be compromised because of this, but it will effect the finishing's you see in your home. Whether it's cracks in the floors or walls, it's always a good idea to get these details documented to protect your future self and home. At A2Z Home Inspections we provide great, timely communication with a process that's clear and straight forward! Being a former journeyman plumber, I noticed multiple issues in this crawlspace I inspected.
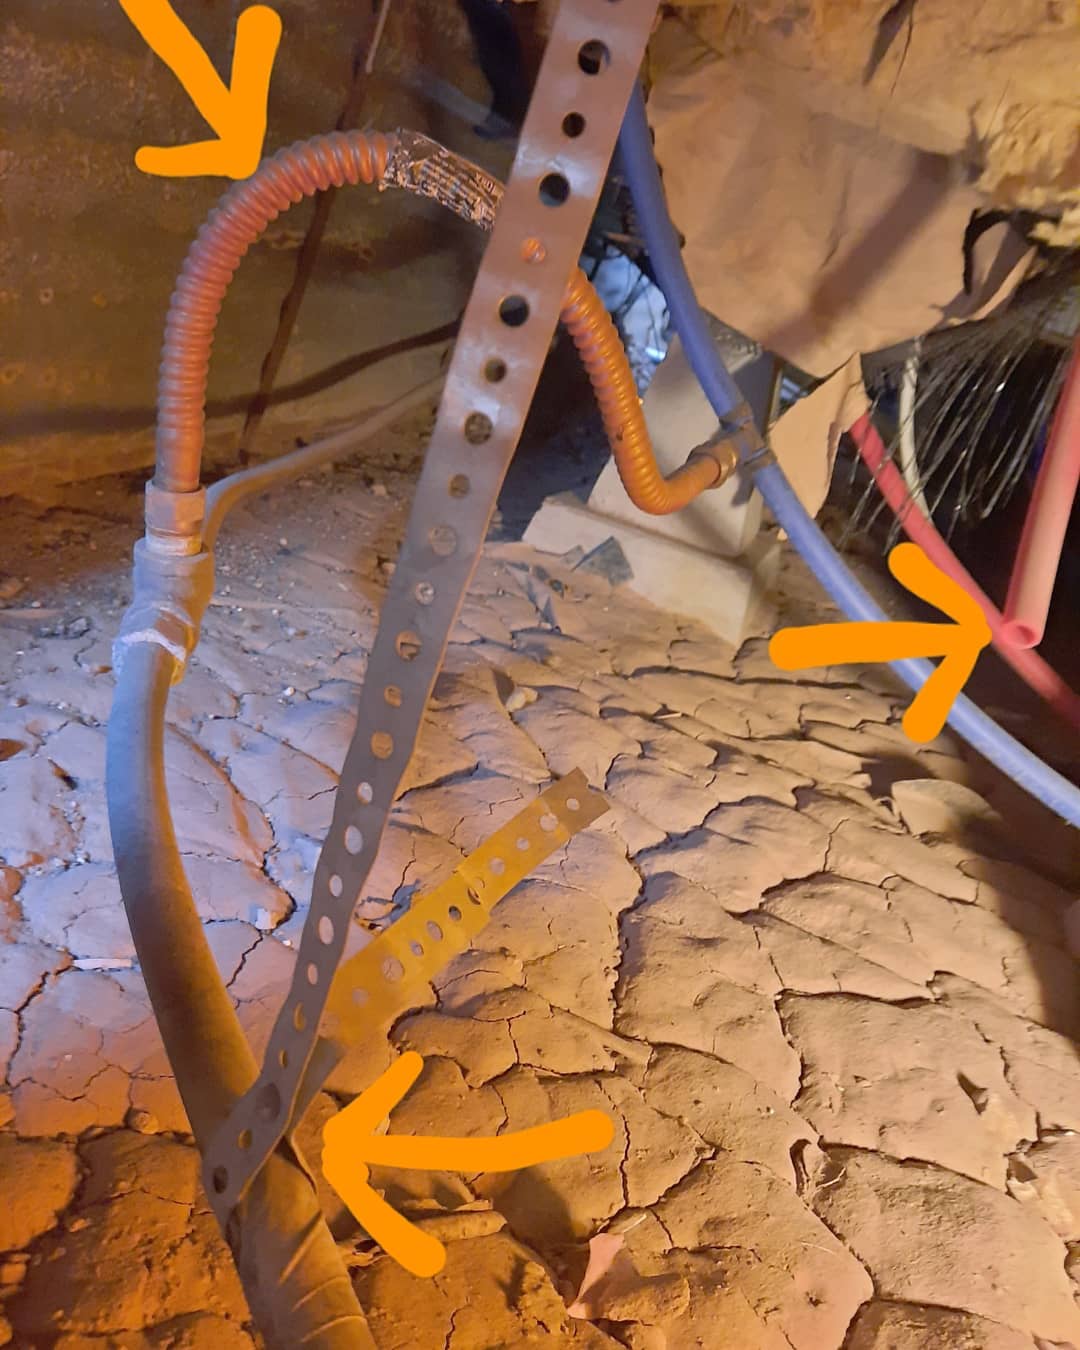
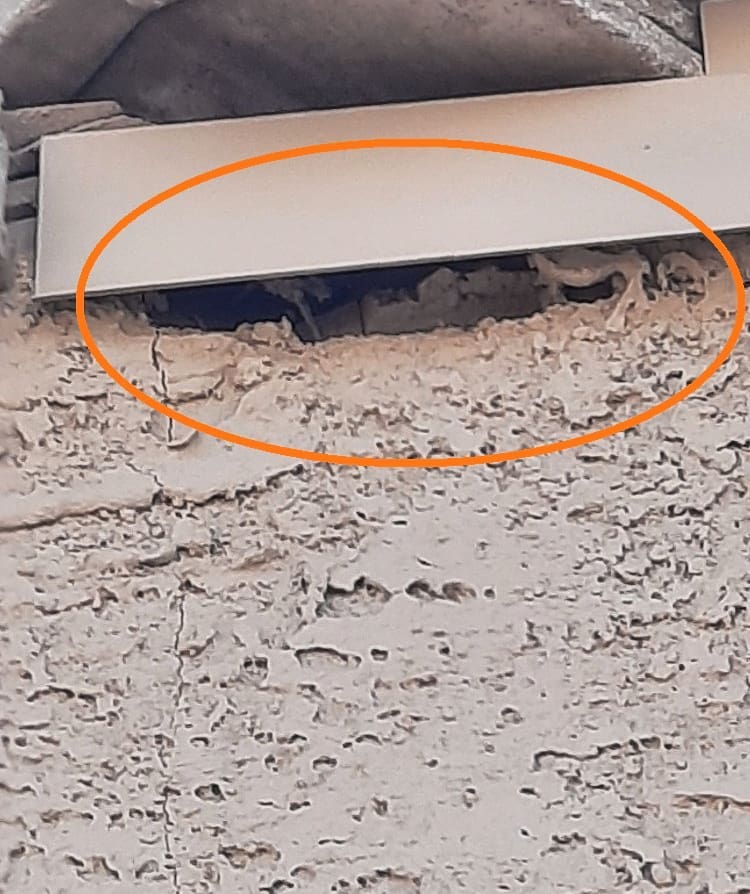
1. The copper flex line (top arrow) is not the proper way to connect to PEX piping (Could lead to future leaks and indicates that it wasn't installed by a licensed plumber). 2. The open red PEX pipe (right arrow) is the TPR (Temperature/pressure relief valve) from the water heater (The TPR valve allows excess pressure/heat to escape the water heater tank. This will lead to added moisture to the crawl space. Also it's not in view to monitor.). 3. The metal band iron strapping(bottom arrow)is in contact with the copper waterline (These two dissimilar metals touching will cause galvanic corrosion and lead to increased deterioration.). Keeping you educated! Owning a new home is great, but they definitely can have flaws. Today on a 11 month warranty inspection, I came across multiple stucco issues. I always find minor cracking, but my picture shows gaps between the stucco and roof flashing which could lead to water intrusion. This could create internal moisture and cause further damage.
This is only one example of why it is so important to get your 11 month warranty inspection documented before your builder 1 year warranty expires. |
AuthorBringing 10+ years of plumbing experience to educate and bring awareness to home owners regarding Home Inspections. Archives
June 2021
Categories
All
|







 RSS Feed

